In my obsession with chalkpaint I continue to try it out on different material.
No need to say my husband has layed down the law when it comes to chalkpainting every single furniture, a long time ago.
As I told earlier, this secretaire was missing drawer pullers after I removed the old, ugly ones, and the hunt for the perfect pullers had begun. I searched and searched through the obvious internet dealers. But I am kind of cheap when it comes to buying stuff, and since this blog is about frugal furbishing after all, I couldnt make my self by new "old" drawer handles for over $30-40.
And it is in moments like these when you really find out who payes attention to what you say and do, because a recently acquaintance of mine, who I actually bought one of my makeovers with, saw my announcement on facebook and said she had six pullers she wanted to GIVE me! Now, if youre in to that kind of stuff, you know thats a BIG DEAL! And whats even better, they had the perfect look! I just had to paint them.
So I mixed up a batch of my homemade chalkpaint, using the color duck egg blue (my favourit!) and started painting. But I had to make shure that they did`nt look completely new, so I distressed them, using sandpaper. and gave them a go with first the clear wax, then the dark to give them an aged look. If I can say so myself, I think I succeded.
And they looked perfect!
Now I only need to find the time to put them on. I suck at finding time to finnish up on last details.
How are you with finishing projects? Sorry to say, but I tend to drag things out by starting on a new project before the old one is completely finished.
(You can read about this post over at Songbirds Vintage Inspirational Party! and at From my front porch to yours )
Viser innlegg med etiketten how-to. Vis alle innlegg
onsdag 8. oktober 2014
torsdag 2. oktober 2014
A house full of doors
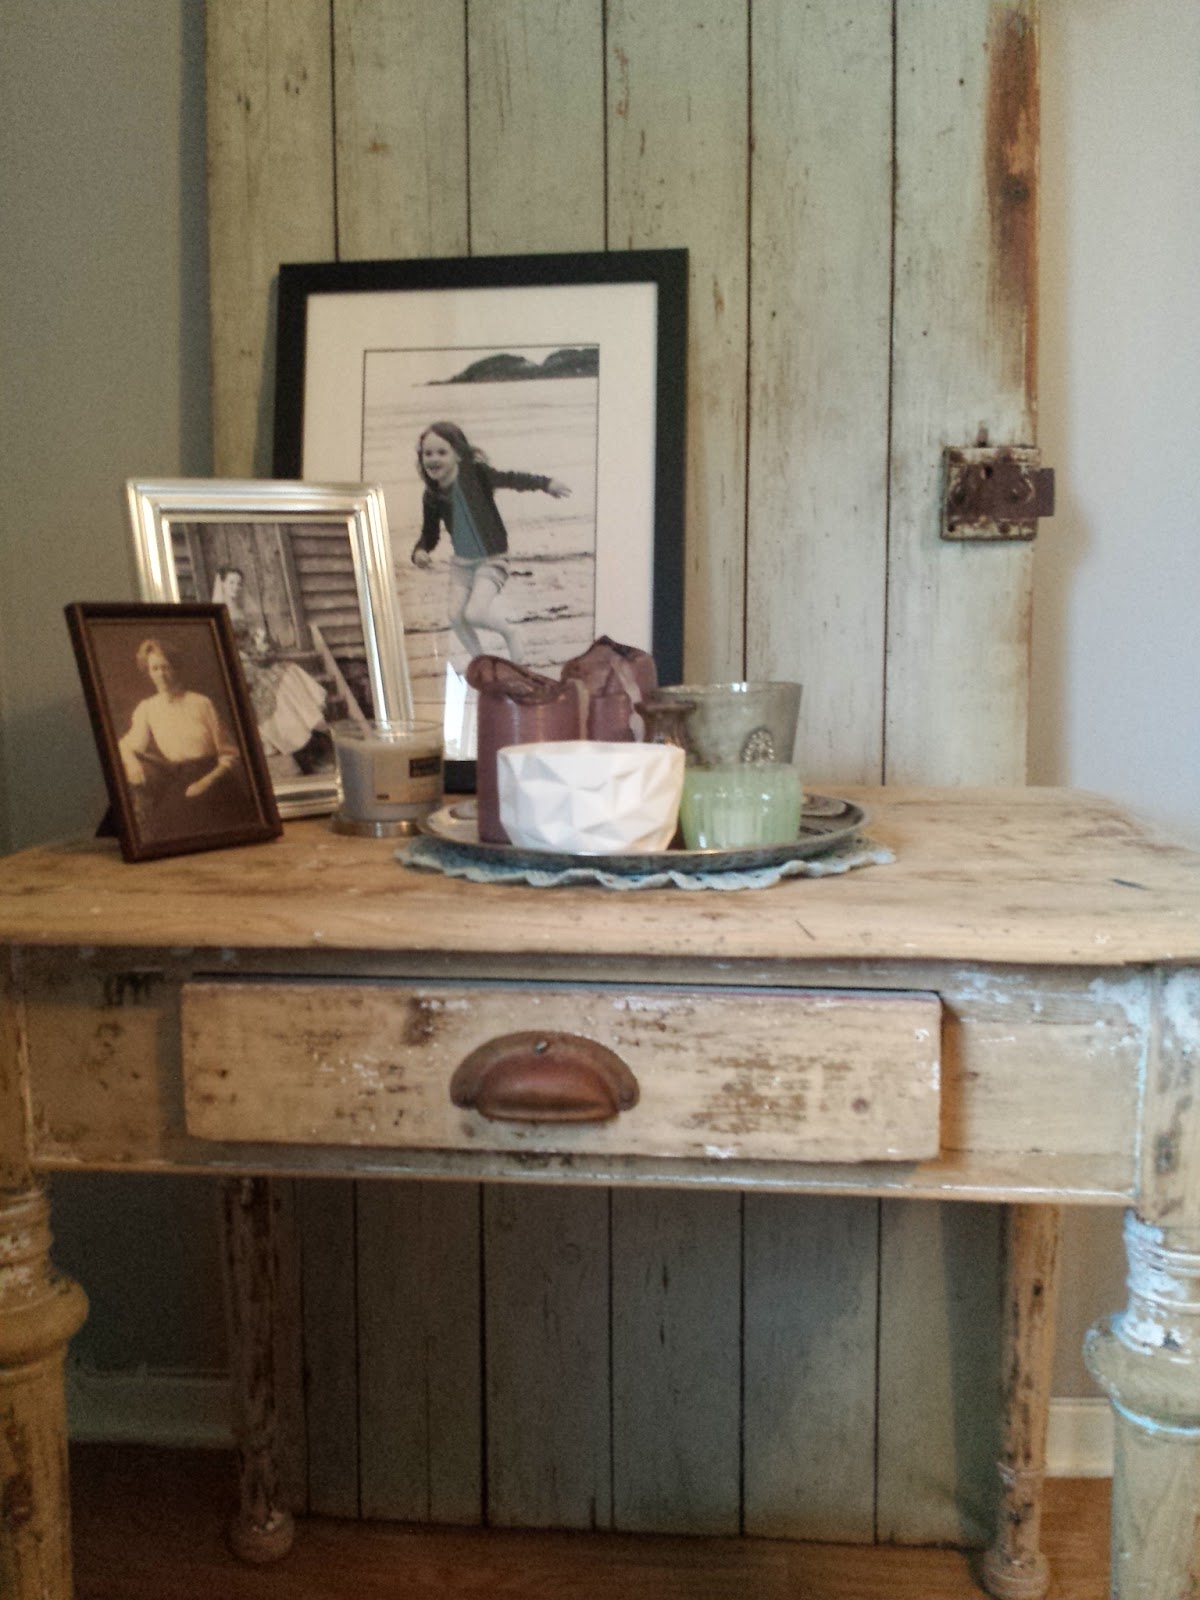
Every house has doors, of course. But ours have a few more. And they are not even attatched to any thing! They are just standing there, leaning towards the wall. Not opening, not closing.
Theire only job is to look gorgeous! Thats right! I use them for decorative reasons.
When my husbands grandmothers old house was up for demolition, we went in and took out quite a few old doors and windows. The house had bin in the family for about 100 years, and this was a great way for the family to let some of it stay alive after the demolition. I was lucky to take home three doors and two windows. I (well, my husband) personally went down the dark, moist, crawling basement to remove them our selfes. I could`nt believe ho beautiful they looked! Old, stained paint had been chipping of for ages, and the looks were still intact with the key! Rusty, but intact.
Look at that lovely, chipped paint.
That is naturally antiqueing for you!
That table har a whole other story to it. But I just wanted to show you how pretty a simple thing like a door can look when you place it in youre interior. And with this old window together with it, it really sets the tone.
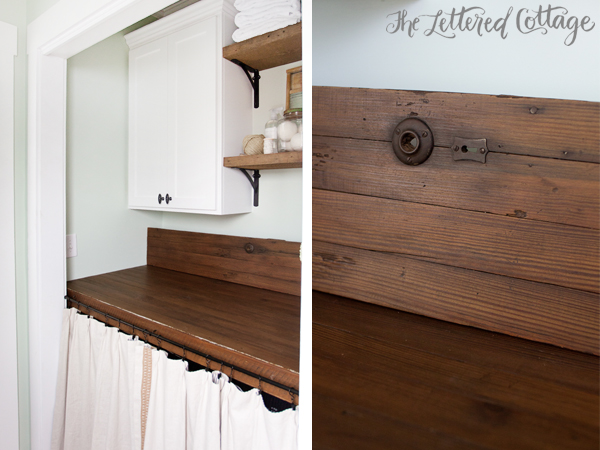
Now, I have two more doors. One just became our new coffee table with custom made hair-pin legs and the third one is about to become a laundry desk in our ever so tiiiiiny bathroom/toilet/laundry room. So stay tuned for more posting!
Here`s a little inspirational pictures for you I found on Pinterest
Now, I have two more doors. One just became our new coffee table with custom made hair-pin legs and the third one is about to become a laundry desk in our ever so tiiiiiny bathroom/toilet/laundry room. So stay tuned for more posting!
Here`s a little inspirational pictures for you I found on Pinterest
On this page I found the idea of using the last door as a laundry room counter.
Great inspiration for making a coffee table out of an ord door here.
Love this cupboard! Allready have the perfect window for it! Why not?
And last but not least, these lovely lamp-walls! Imagine how great they would look next
to a bed, behind youre nightstands.
So many possibilities, so little doors!
Thats it for now. Do you have doors and windows leaning against your walls that are decorative reasons only? I would love to hear about what ideas you might have for it.
Shared at Songbirda Vintage Inspirational Party, Prodigal Pieces
A big thanks to these ladies for featuring me on
The Vintage Inspirational Party
and Prodical Pieces
fredag 26. september 2014
How to whitewash - A make over of our second-hand dining table -
Right before our big move to our house last desember, my husband was given a laaaarge dining table from his workplace. There it had been used as a conference table. It was big, had rounded ends, metal legs and two extra feeder plates. It had a brown-orange-like color, not so bad. But it did not fit the style I was going for. But it would actually take me about six months before I did anything about it. Our kids use it for homework, playing, drawing, painting and we have our dinners there. So eventually it had sustained quite a lot of "injury" on the top. It had come to the point were I couldnt focus on eating my dinner anymore. All I saw was the staines and cuts on the table top. Something HAD to be done, soon!
I really didnt know what to do with it, I just knew (and heard) that its not easy to paint a big surface like that without having all those brush strokes showing. Besides, I wanted an old and distressed look on the wood. So, my first thought was to sand it down and give it a turn with homemade staining. You know, the kind you make yourself. "Project sanding down insanely amount of wood" was on. My first thought was: "pft... I can do this with sanding paper! No problemo!" Way problemo!
It was too time consuming and my arms was killing me. So we had to find a sanding machine.
(should have done that the first time....) It made the work a lot better, but unfortunately, we still had to do a lot of manuell sanding to get all the way "in there".
Then, when I thought we had done enough sanding (obviously NOT), I startet putting on the DIY staining. I am shure this is a suuuuper good idea on light/new wood. But for this sucker, not so mutc. It was horrible! I even tried waiting several days to let the stain get settled. But that never happeden.
Burned-out furniture was not the look I was going for. So..... what to do?
I spent a couple of nights searching Pinterest for ideas and tips, and came up whit drypainting!
Obviously, there are different ways to do it, but I came up with the right formula for my paint.
I used 1 part paint and 1part water, stired it well and used a wide pencil and just slightly dipped the tip in the paint. Then I went bananas! Haha... Since there is only a tiny amount of paint on the pencil, I used a little force to get it on. Just brush it! Brush it reeeeaaal good! Up and down in big movements. And preferably without lifting the pencil halfway on the table. You want the pencil stroke to go all the way from one end to the other. A rag is allso a very good tool here to wipe of excess paint. Remember, its supposed to be dry!
I actually did this three or four times (I lost count...) before I was satisfied.
Now I had to come up with some thing to look it all in, and protect it against new injuries. I read up a little on that to, and the solution was simple. Floor lacquer. It is strong, sustainable and see-through. Perfect! Another good advise I was given her was to use the matt kind. Not the shiny one. Then the white paint most lightly will turn yellow! And we did not want that! Another tip here is to apply it with a roller! No brush strokes:)
After two coats of matt floor lacquer, it was done! And we had a shiny new dining table!
It was a lot of tryal and failing, but it was worth it in the end. And no it sits much better in our dining room. And it can take a lot of beating to, thanks to the lacquer!
This picture was taken at christmas last year,
before anything was done with the table.
It was too time consuming and my arms was killing me. So we had to find a sanding machine.
(should have done that the first time....) It made the work a lot better, but unfortunately, we still had to do a lot of manuell sanding to get all the way "in there".
Burned-out furniture was not the look I was going for. So..... what to do?
Obviously, I had`nt done enough sanding. But at this point, looking at the results,
I had given up...
Obviously, there are different ways to do it, but I came up with the right formula for my paint.
I used 1 part paint and 1part water, stired it well and used a wide pencil and just slightly dipped the tip in the paint. Then I went bananas! Haha... Since there is only a tiny amount of paint on the pencil, I used a little force to get it on. Just brush it! Brush it reeeeaaal good! Up and down in big movements. And preferably without lifting the pencil halfway on the table. You want the pencil stroke to go all the way from one end to the other. A rag is allso a very good tool here to wipe of excess paint. Remember, its supposed to be dry!
See the difference?? The strips of light there is actually my chandelier.
Now, THIS is what I was going for!
I actually did this three or four times (I lost count...) before I was satisfied.
Now I had to come up with some thing to look it all in, and protect it against new injuries. I read up a little on that to, and the solution was simple. Floor lacquer. It is strong, sustainable and see-through. Perfect! Another good advise I was given her was to use the matt kind. Not the shiny one. Then the white paint most lightly will turn yellow! And we did not want that! Another tip here is to apply it with a roller! No brush strokes:)
After two coats of matt floor lacquer, it was done! And we had a shiny new dining table!
It was a lot of tryal and failing, but it was worth it in the end. And no it sits much better in our dining room. And it can take a lot of beating to, thanks to the lacquer!
Mutch better!
Have you ever tryed drypainting? What is youre experience with it?
Abonner på:
Innlegg (Atom)


.jpg)