Viser innlegg med etiketten second-hand. Vis alle innlegg

tirsdag 8. desember 2015

Teak secretaire transformation

Hello everyone!

Last few weeks have been busy, busy, busy!
But I have had the time to paint a few pieces. One of them wich I`ll show you today.
A local office was announcing that they were getting rid of alot of old furniture. All of it dating back to around the 70`s. Among the items were a sleek teak desk, a teak secretaire and an old wooden stool.
I called and announced that I could pick up these three pieces later that day. No worries, they would hold them for me.
Guess what happened? Yep.... someone else got there before me and "stole" them from me! Aaaaah...!  I hate it when that happenes! I know it was free furniture, but still! They said they would make sure no one else got it. Well, well...... At least I got to bring home the teak secretaire desk.

It stood in the basement a few days before I brought it in. I was just waiting for an aha experience on what to do with it. And it did come! A few weeks ago, I bought some left over wallpaper, and still had this amazing piece that actually costs a fortune! About $115 per roll! Jikes! I was happy I only had this one meter! Haha....

So then It all came down to the colors. I used (no surprise there...) Miss Mustard Seeds milkpaint in the colors Typewriter, Bergere, Trophy and Shutter Grey. I mixed them a little around.


The sides I painted with Typewriter. That was a new ecperience for me! I was hoping for a bit more glossy finish on the color after waxing. But instead I felt that it looked a little more like chalkboard.... Maybe hempoil is better? The real showstopper here though, is the wallpaper on the front. I wanted the paint colors to reflect in it. I think they are quite on spot, dont you?


On the drawers I used a mix of Bergere and a little Trophy, and I got a hold of a huge lot of antique pullers. They were perfect!


And the same for the inside. I wanted some of the original teak color to play a part of this piece, so I left the top, edgings and the inside shelf as is. The little drawer allso got a piece of the highly expencive wallpaper.


I actually think this picture is before waxing...


The inside of the drawers were in PERFECT condition! It surtainly didnt look like they were 30-40 years old! So I left them as is. 
(Hey! Did you by any chance see that I allso painted the floor in this room?? Scroll up to the other pictures and you`ll see the transformation. No more 70`s cork vinyl floors! ) 


When posting it on facebook for sale, there was a lady who just could`nt restrain herself, and asked how in the world I could ruin all these lovely furniture?! She had seen alot of my pieces, and her opinions was that I ruined them with my painting, and that they were ugly. I will admit that it got to me for a second, but I obviously have fans, because she got really put in place by other people standing up for me. A very talented woman I know told me: "You are not famous before you have haters". Maybe that is true?....
Anyways, someone really fell to its liking, and got to take this (very nice if you ask me) teak secretaire home! So I am happy:)


Shared at


torsdag 3. september 2015

French vintage dresser

Happy friday everyone!
I`m still riding on my own little cloud after making a great sale yesterday!
A couple of weeks ago I decided I would take this furniture-painting to a whole other level, and opened a Facebook page dedicatet to the furnitures I find, buy, paint and restore. I have ambitions about someday being able to make this to more than a hobby.
Ever since that day I have been picking up furniture ALOT! Our top floor is full of furniture in all shapes and sizes. Haha....

Yesterday I finished a lovely french dresser, that I had been working on for 3-4 days (I still have a full-time job, two kids and a husband, so things take time).

When I picked up this piece, it was in perfect condition! Not a single scratch! The former owners must have taken really good care of it! It was allmost as I felt bad that I was going to paint it....
But I really dont regret it.

Here is the "before"


It was very nice and all, but it just did`nt do it for me....

I knew I wantet to try one of Miss Mustard Seeds newest colors, Schloss. So I went for that and Iron Stone. Both are great colors! Besides, nothing beats grey on a french old wornout piece of furniture, Since that was the look I was going for.

I startet out "highlighting" some areas with the darkest of the color, Schloss. The side panels and the drawers were going to be white, so I wanted the grey to show under a little bit, to give it a little depth
.


After that, I sort of went in my thinking box, I often do that, right after I have startet on a piece. Because usely I havent decided what I want it to be before AFTER I have startet. 
But I knew I wantet it to look old, and worn, and french. And not perfect. I wantet it to look chic.
Thats where the dark antique wax comes in. It makes wonders! It is the perfect touch for an old, worn look.

What do you think? Did I do just that?


Oh, as I was sayin... I am still soaring on a cloud of happy, because this lovely dresser sold after only 15 min after I put it out for sale on my facebook page. A lady really liked it and wanted it right away! I must be doing something right, huh?

Thanks for stopping by! Have a great weekend! I am taking my family up on the mountains for the weekend, where I will propably dream about my next project! 


Shared over at:


mandag 24. november 2014

Vintage media stand with sliding doors. Once again with the chalk paint!


This is an old project. In fact, it was #2 in my refurbishing carrier. I was very intrigued by the sliding doors on this one. And the drawers were just lovely. Unfortunately, the top had a big stain that looked like something fluid had extracted into the wood, as well as inside the cabinet. So something had to be done. I didnd mind!


Look at those legs!


I mixed up the same batch of color that I used on this cabinet. Allso, the edges got a different shade, very similar to the main color, but a little greener. 


The inside of the cabinet is what I would call a result of my inpatience and lack of more paint.
But I think that combo worked, in this perticular situation.

Now, the sliding doors were quite a challenge, because what do you think happens when you get lots of thick paint in between the sliding door- thingies?  Thats right! They get stuck when the paint dryes!
So I had to use some force to loosen it up, and get the paint to release from the door panel. Once I had run them back and forth a few times, it went much smoother. 

To finish it of, I used clear wax, mainly on the top and on the front of the drawers. Allso, I put a little on the sliding doors, hoping that it would give them a smoother slide. And I guess it did, because I have not had any problems with them since. 
A little dark wax on and around the handles and drawers gives the whole piece a little more authentic look, vintage-vise. 


And there you have it! a perfectly good, vintage, chalkpainted tv stand!

mandag 3. november 2014

A makeover of my mysterious antique sideboard + getting to know Miss Mustard Seed milkpaint


Here it is guyes! At least part of it. I spent most of my weekend (in parts) painting and sanding this beauty. I painted with Miss Mustard Seed Milk Paint. This was my very first time using milkpaint, and I actually found an online shop here in Scandinavia who sells MMSMP, its called Skattkammaren.

The how-to for milkpaint  is not so very different from the chalkpaint, wich I have used several times. And I was aware of that MP is a very unpredictable product when it comes to behavior. I was hoping for a little chipping of the paint, but that did not happen. I even tried a few tricks I had read about, like using a hair dryer on the wet paint right after aplying it, and even paint on a second coat before the first has dried. But no.... I guess the surface was to saturated and "dry". The sideboard is most likely over a 100 years old, and it has not been sealed or treated with any thing for a looooong time. It simply had dried in. Oh, well. On to the sanding then, my favourit part! The details on the mirror are just lovely! And I feel I got to put them in their right element with this color, plus the sanding and distressing helps to bring it out.

I had another issue with this piece, and that was the marble top with the big hole in it for the sink. You can see pictures of it here, before I started painting it.
Obviously, I am not using it as a bathroom furniture, så I (aka my husband) had to build a new one. I had the plans ready in my head long time ago, but you see, we dont saddle the horse and ride the same day.
After finally buying the material for the new top, we buit it yesterday. And it was a perfect fit! I am so happy with the results!


We screwed on three bearers under the boards, to hold them stable, and the desk fitted right in. 
No it wont budge!


I actually read that  milkpaint is the perfect paint for raw wood! Did you know that?? It works as a stain, and sucks right in to the wood, fast! It is brilliant. Then it is all up to you how thick or opaque you want the stain to be. I actually mixed it out quite thin, but applied 3-4 coats. And then I sealed it with clear wax.
I havent gotten to distress the bottom om the sideboard yet. Its like I am postponing the process so that it wont finish to fast. It is so much fun, and I want it to last! But of course, I want a beautyful finished furniture to shine in my diningroom, too.
I was actually a little sad when I spent the very last grains of milkpaint, thinking this is it. Now its empty...  I know, I`m weird....

Now, I have big plans for the bottom part and the doors! It involves a jigsaw and chicken wire.
Woohooo! I am so exited! Please stay tuned for part two of this amazing (I think so...) reviel of the makeover of my mysterious antique sideboard.

Have a good day everyone:)


(You can read about this post over at Songbirds  Inspiration Party and at the "Youre time to shine"-party

søndag 26. oktober 2014

Pumpkin and fall vignette

I really love sundays. Except that after sunday comes monday. Dont love that so much.
Sundays are great days to fiddle around with your interiour, move things around and get lots of new ideas. 
I bought these really cute, little pumpkins for decorating. I see they are "all over the place", so I wanted to try them out. First I thought of painting them with chalkpaint like these that Kelly over at Jax does design made. I love the whole painted pumpkin consept! I might still paint mine,  but for now I`m going to enjoy the lovely fall colors.


My chalkpainted secretaire finally got its drawer handles mounted. The pine cones were picked by my little man at kindergarden, the basket is a thrift shop find, as is the cake stand. I found the mirror in the barn while looking for treasures (find one!) And then theres these cute, little baby pumkins. Dont they look lovely?


Have a great sunday!

torsdag 23. oktober 2014

The mysterious antique sideboard

Good things happen to good people, or at least I like to think so.
When I was asked if I wanted to to take this piece out of a friends hands, I allmost cryed a little.
I was so excited I didnt know wich foot to stand on!


These are the pictures she sent me, I allready then I could see that it was pretty unique!
 It had been doing the job as a bathroom furniture in a house they just bought, and they did not have room for it. They had several people asking if they could have it, but they wanted to ask me first, after seeing all the furnitures I have "transformed". It obviously should go to someone who knows what they are doing. Hahaha....
So now the pressure is ON!


As I mentioned, this used to be a bathroom furniture, but we dont have space for this in the bathroom (oh, I wish!) so we removed the sink. Which ofcourse left a big gaping whole in the marble top. In lack of anything else for a top, I placed a vintage window and threw on some decorations on it.
At least its better for now, than the big gaping whole....

Not very apeiling

I off course tried to make some sense out of this piece of furniture before I start doing any major work. How old is it, what origin does it have? Was it originally a bathroom furniture?  (I have a sneaking suspicion it`s not), is it valuable? But from an antiquarian perspective it is ruined. 
The one front door has a big crack, the drawers have been removed to make room for the sink, only leaving the drawer fronts and off course the desk top which I suspect is not even original.
But still, it is an amazing piece! Just look at the carwings on the top of the mirror!  And the whole piece is allmost six feet tall! It is definitely a keeper. 


Now I am trying to find out how I want it to look when I am finnished. I was thinking about trying milk paint. What do you guys think? Is this looker a good candidate for milkpaint?

torsdag 2. oktober 2014

A house full of doors

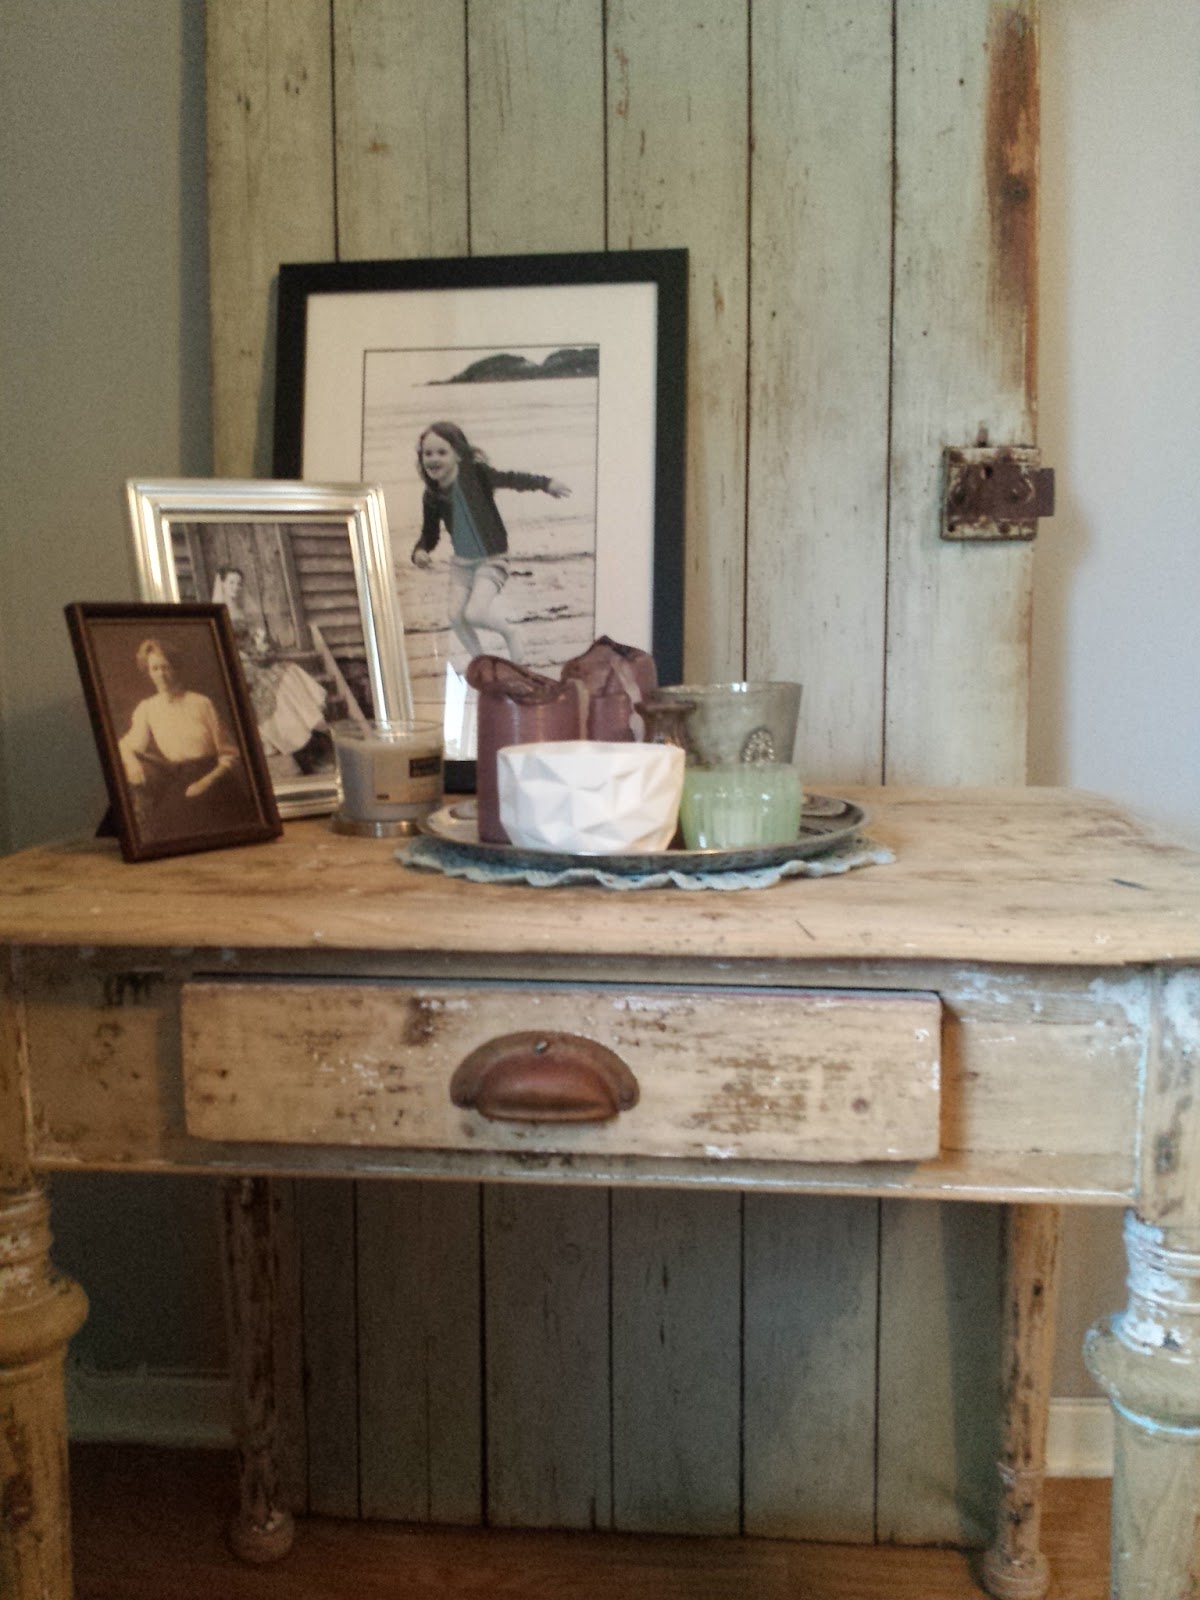
Every house has doors, of course. But ours have a few more. And they are not even attatched to any thing! They are just standing there, leaning towards the wall. Not opening, not closing.
Theire only job is to look gorgeous! Thats right! I use them for decorative reasons. 
When my husbands grandmothers old house was up for demolition, we went in and took out quite a few old doors and windows. The house had bin in the family for about 100 years, and this was a great way for the family to let some of it stay alive after the demolition. I was lucky to take home three doors and two windows. I (well, my husband) personally went down the dark, moist, crawling basement to remove them our selfes. I could`nt believe ho beautiful they looked! Old, stained paint had been chipping of for ages, and the looks were still intact with the key! Rusty, but intact.


Look at that lovely, chipped paint.
That is naturally antiqueing for you!


That table har a whole other story to it. But I just wanted to show you how pretty a simple thing like a door can look when you place it in youre interior. And with this old window together with it, it really sets the tone.
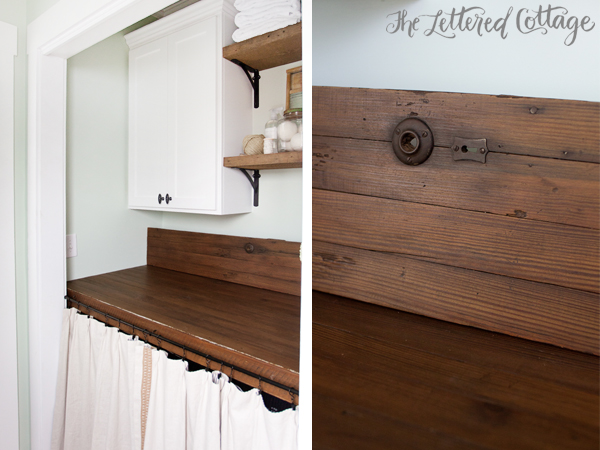
Now, I have two more doors. One just became our new coffee table with custom made hair-pin legs and the third one is about to become a laundry desk in our ever so tiiiiiny bathroom/toilet/laundry room. So stay tuned for more posting!


Here`s a little inspirational pictures for you I found on Pinterest


On this page I found the idea of using the last door as a laundry room counter.


Great inspiration for making a coffee table out of an ord door here.


Love this cupboard! Allready have the perfect window for it! Why not?


And last but not least, these lovely lamp-walls! Imagine how great they would look next 
to a bed, behind youre nightstands.
So many possibilities, so little doors!


Thats it for now. Do you have doors and windows leaning against your walls that are decorative reasons only? I would love to hear about what ideas you might have for it.


A big thanks to these ladies for featuring me on 
The Vintage Inspirational Party


tirsdag 23. september 2014

Antique secretary make-over with homemade chalkpaint

In my very first post, I showed you this old, worn out secretary desk I bought.
I actually dont know what time-period it originates from, but I would guess some time around the 1950`s. 
It had a very dark sort of laminated color. I think the right woord would be plywood. 
Heres a before picture:


You can see here that I took off the handles, and plastered the screw holes.
I chose to this because:
1) The handles werent "all that" 
2) One handle was missing
So I figured that the smart thing to do would be to just remove them and replacee them with the perfect ones (still have`nt found them, though....).

There was allso a couple of places on the drawer that the plywood had chipped of, so I put som plaster there to.


Just look at all those tiny drawers and the pillars. They make a beautyfull detail. Unfortunately the keys didnt come with. 

Look at this paper the former owner put in the bottom drawe. This was a very common thing to do, maybe to protect the wood?


Here is the secetary desk closed up. The desk can be pulled out or in. Offcourse in this case it is pulled in. All in all it was a quite functional piece, except for one VERY tricky drawer....
Will have to work a little on that one.

So.... after a good cleaning and a little sanding (I try to avoid that as often as possible. Simply because I hate sanding) the secretaire was ready to be painted. And with what else then chalkpaint?! 
I love chakpaint. For so many reasons. Will make a post of that some other time, and how I make my own.

I had allready decided, after spending quite some time on Pinterest looking for inspiration, that I wanted the piece to have two colors. One for the cabinet it self, and another one for the drawers. Here`s a color palette I took inspiration from:


I first gave the whole piece a layer of a light white-ish color called "mist". Then I painted the drawers with a green color called "prism green". It fits perfect with my other interior. 


Getting inside this compartment here was a bit tricky. In fact, it was impossible to get in there with my brush. So I took a cloth, dipped in the painting and rubbed it all over. 


I made shure that the green didnt cover completely, since I wanted the white to shine through. So I started of carefully, allmost drypainting the drawers. The thing with chalkpaint, is that it dryes so fast! I was done in a couple hours, and then I could start sanding. This is a great way to make furniture look old and distressed. When I sand, I try to think of wich areas that would get most worn and torn the naturally way. You know, if this was a really, really old piece. 
Then it is time for the waxing. This is where the magic happens! I love the affect that waxing makes!
It really gives you the impression that the piece has a history and a soul. And it looks real! I do this by using first clear wax, then go over again with dark wax to make the wanted effect. But it is very important that you give all the surfaces a really good coat with the clear wax before putting on the dark wax. Or else you could risk the paint to suck up the dark color, not being able to rub it off again.


And here it is! I love the detailing on the pillars. The sanding and waxing works perfect together.


And there you have it! Only missing the hardwear now, then it is complete.
What is youre opinion? Would love to hear about it:)


Shared over at Prodigal Pieces